How do I change the email text that is sent to the customer?
357 views
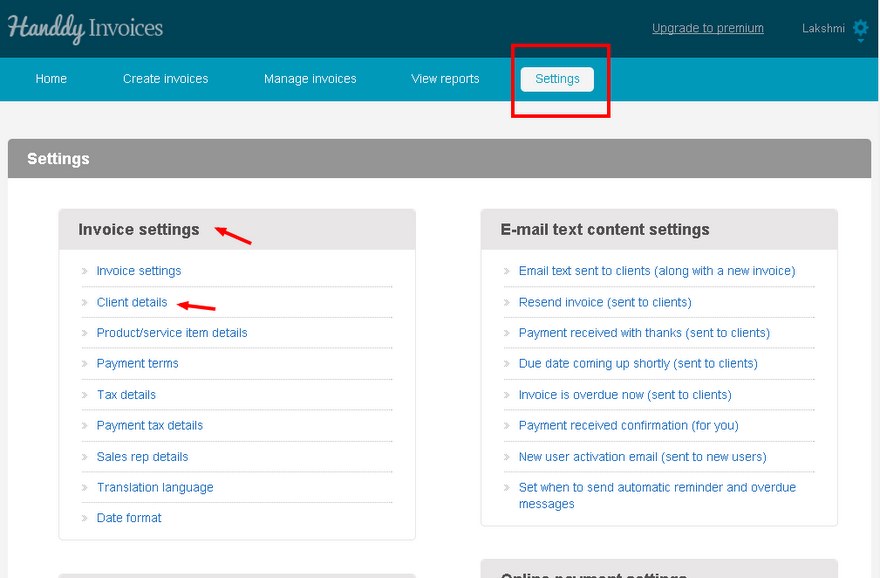
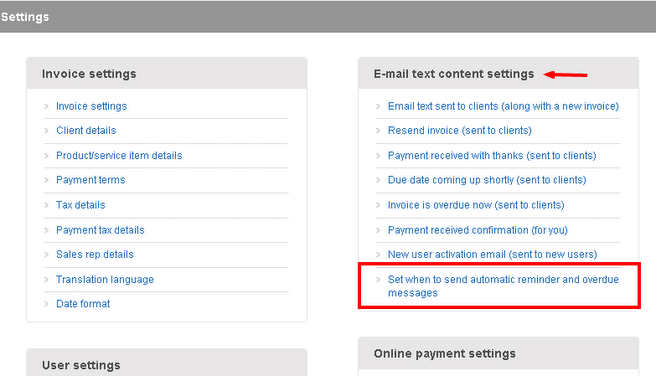
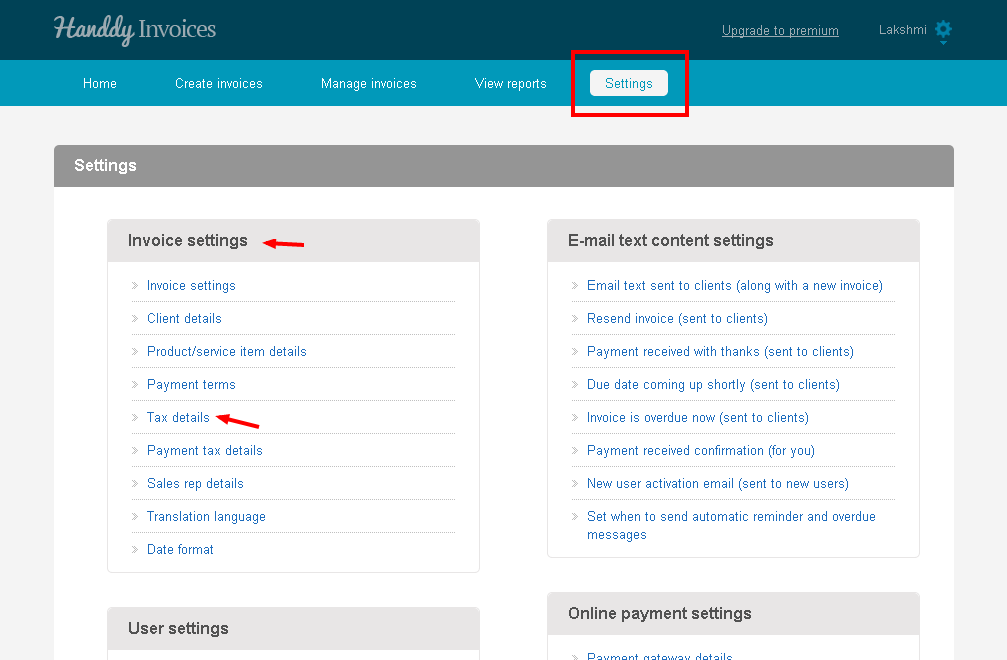
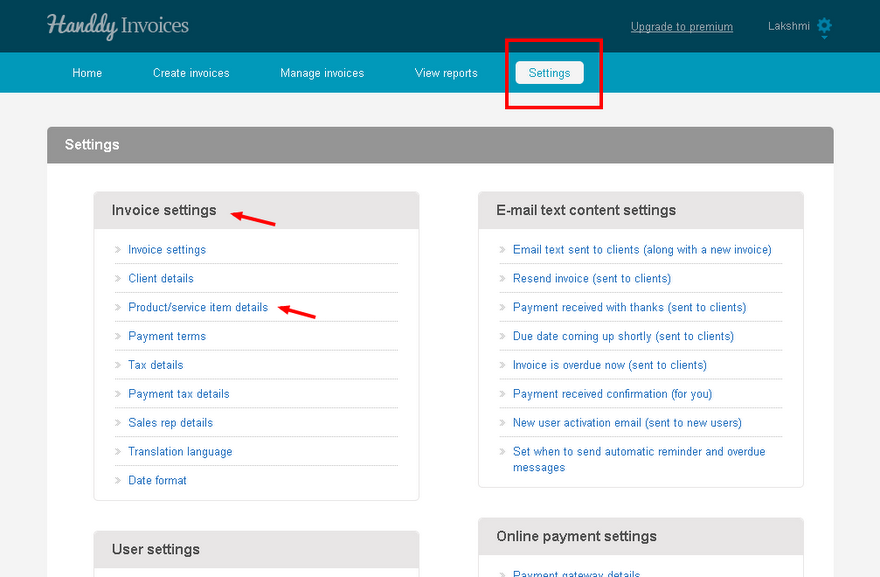
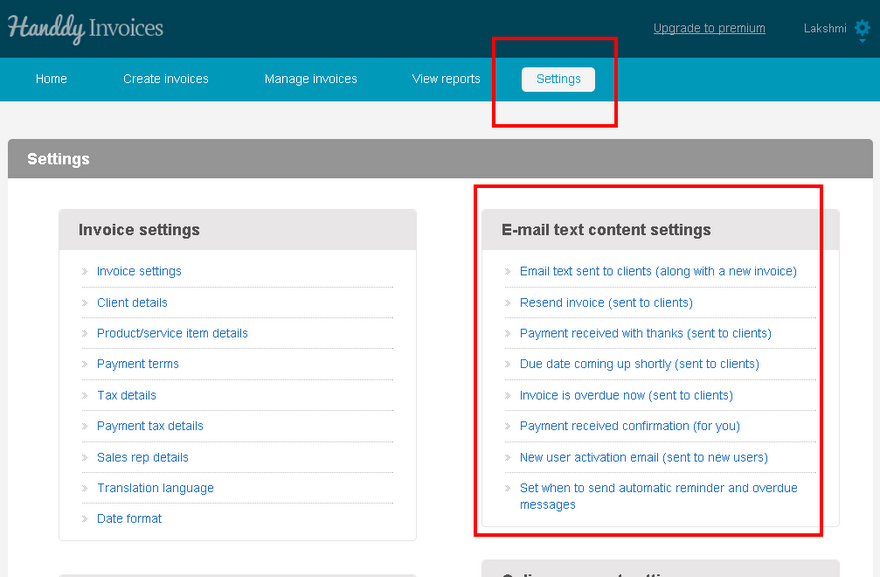
- Under ‘Settings’ is the ‘e-mail text content settings’ which has options like
Email text sent to clients: This email text is sent to your clients along with new invoices
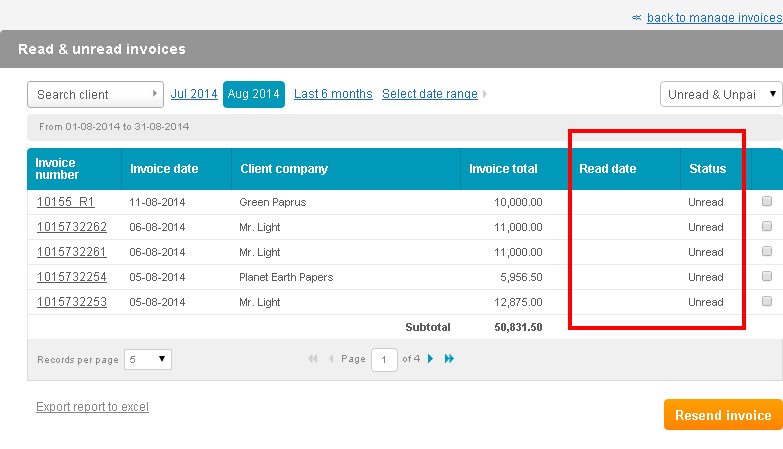
Resend invoice: This email text is sent to your clients along with new invoices
Payment received with thanks: This automatic email is sent to your clients after they make payment
Due date coming up shortly: This automatic email will be sent to your clients to remind them of the due date to make payment
Invoice is overdue now: This automatic email will be sent to your clients if invoice is not paid by due date
Payment received confirmation: You will get this email when your client makes the payment
New user activation email: New user activation email is sent to new users. This automatic email is sent when you add a new user within your account.
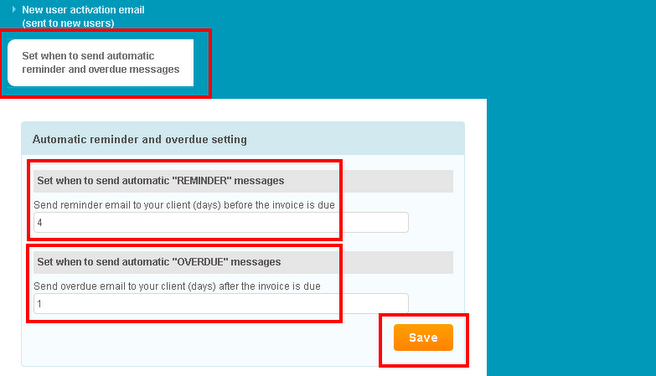
Set when to send automatic reminder and overdue messages: Automatic reminder and overdue setting.
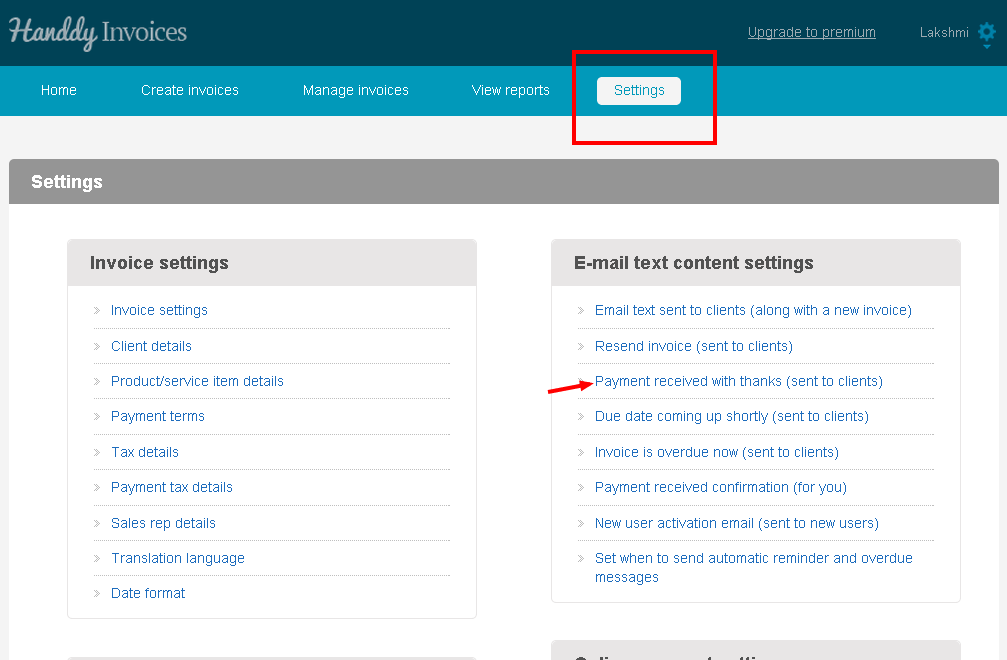
- Depending on the task that you wish to perform, you can select a particular option.
- For an example, if you wish to acknowledge your customer for the payment that you received, select ‘Payment received with thanks’ option.
- An email template opens up with the subject line ‘Thank you for your payment’
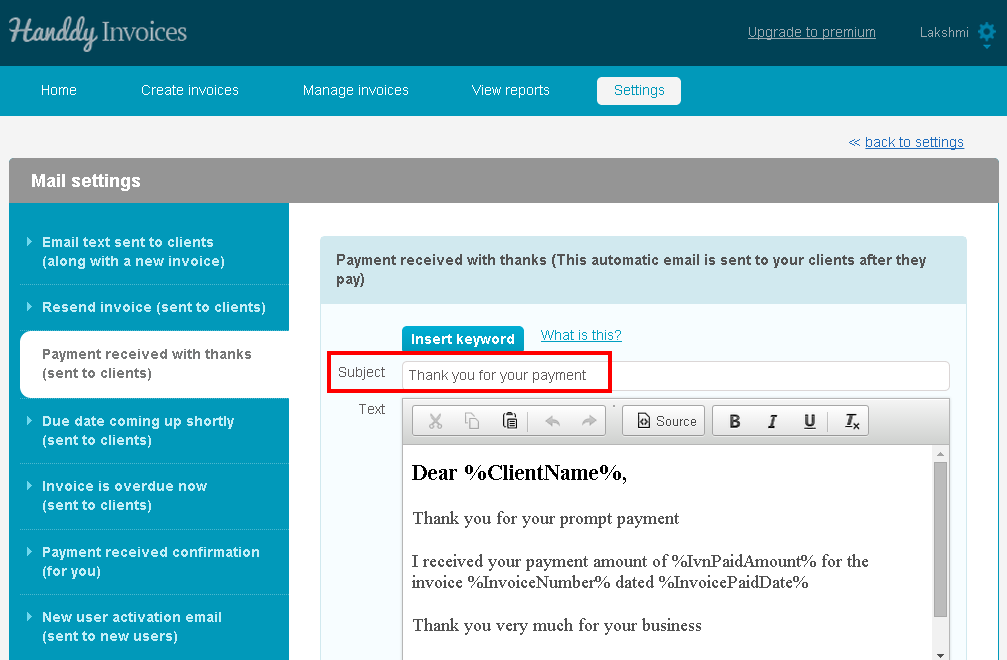
- By default, the email will have content. Do not edit anything enclosed within “%”. These are codes for relevant invoice number, company name and so on. The relevant information will be inserted automatically into your email.
- You can edit the text outside of the coding (%) and change the message you wish to convey in the body of your email and/or the subject as required.
- If you want to edit the keyword between the %, select the keyword from the drop down list below and insert it at the appropriate places.
- Click on ‘Update’ option after you have made the required changes.
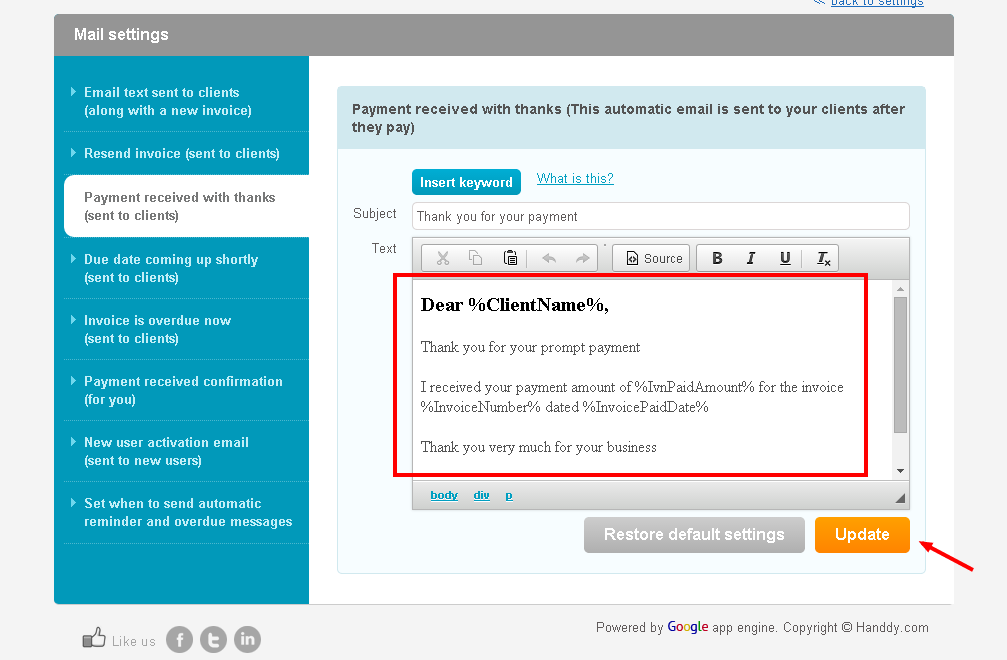
- An email will be sent to your customer
- Select ‘Restore default settings’ option to switch back to the default settings
Note:
Have you tried our self employed online accounting software yet? Get it now